Are you looking for a fun and creative way to express yourself through jewelry? Look no further! This article will introduce you to a wide range of unique string bracelet designs that you can easily make at home. Whether you are a beginner or an experienced DIY enthusiast, these DIY techniques will guide you step-by-step in creating beautiful and personalized string bracelets that are sure to be eye-catching accessories for any occasion. So, grab some colorful threads, unleash your creativity, and let’s get started on this exciting bracelet-making journey!

This image is property of images.unsplash.com.
Macrame Bracelet
The macrame bracelet is a trendy and stylish accessory that you can easily make at home. To create your own macrame bracelet, you will need a few materials. First, gather a length of macrame cord or thick string in a color of your choice. You will also need a pair of scissors and a small, decorative button or bead for the closure.
Now, let’s dive into the step-by-step instructions. Start by cutting two equal lengths of the macrame cord, each measuring about 12-14 inches. Fold the cords in half and align the folded ends. This will create a loop at one end, which will serve as the closure for your bracelet.
Next, take another shorter piece of cord, about 6 inches long, and fold it in half. Place the folded midpoint of this shorter cord over the two longer cords, approximately 1-2 inches below the loop. Now, tie a knot around the longer cords to secure the shorter cord in place.
With the shorter cord secured, you can start creating the macrame pattern for your bracelet. Divide the longer cords into four equal sections. Begin by taking the cord on the far left and crossing it over the two middle cords. Then, take the cord on the far right and cross it over the left cord and under the two middle cords.
Repeat this pattern, alternating from left to right, until you reach your desired bracelet length. Remember to keep the tension consistent so that your macrame pattern remains tight and even.
Once you’ve reached the desired length, secure the ends of the cords with a knot. Then, attach your decorative button or bead to the looped end of the bracelet as a closure. You can either sew it on or use a small piece of the remaining cord to tie it in place.
Now that you have the basic macrame bracelet down, you can get creative and experiment with different variations. Try using multiple colors of cord, adding beads or charms to the design, or even incorporating different knotting techniques. The possibilities are endless!
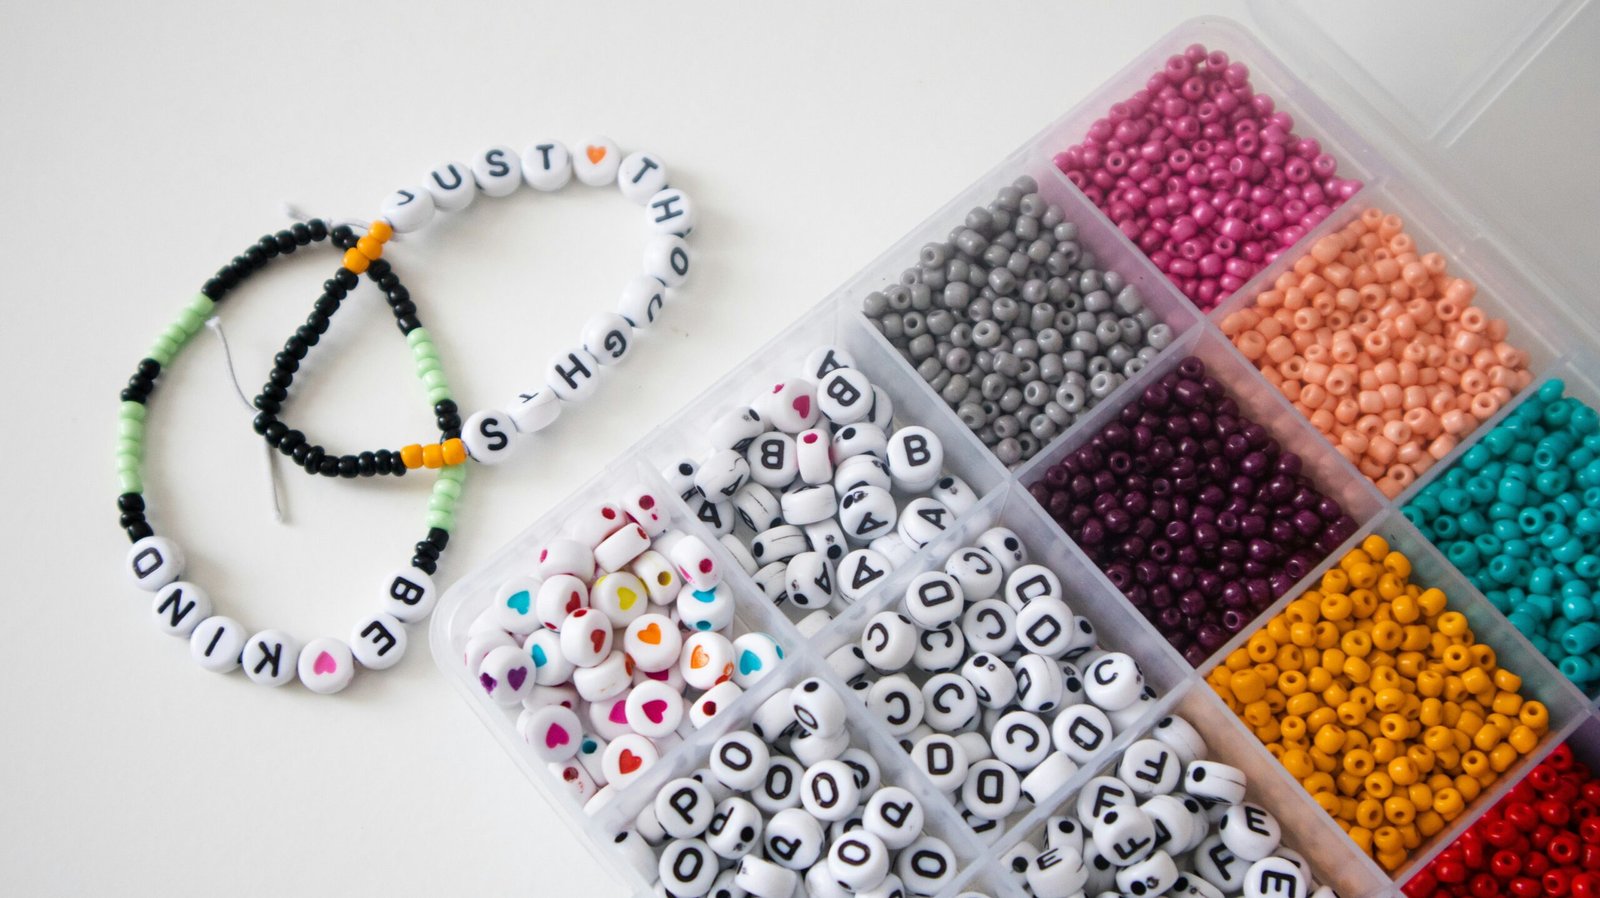
Beaded Bracelet
Another fun and versatile bracelet design to try at home is the beaded bracelet. This type of bracelet allows you to explore different bead patterns and create unique and personalized accessories.
To make your own beaded bracelet, you will need a few materials. First, gather your choice of beads in various colors, shapes, and sizes. You will also need beading thread or stretch cord, a beading needle (if using thread), scissors, and a closure, such as a clasp or a knot.
Let’s walk through the step-by-step instructions. Start by measuring the length of your wrist and add a few extra inches to account for the size of the beads and the closure. Cut a piece of beading thread or stretch cord according to the measurement. If using thread, thread the beading needle onto one end of the thread.
Next, string the beads onto the thread in your desired pattern. This is where you can get creative and experiment with different bead combinations and arrangements. You can create a simple pattern using one type of bead or mix and match different beads to create a more intricate design.
Once you’ve strung all the beads onto the thread, secure the ends by tying a knot or using a closure. If using a clasp, attach it to one end of the thread before tying the knot. If using a stretch cord, simply tie a secure knot at the ends to create a loop closure.
To add an extra personal touch to your beaded bracelet, you can also experiment with different bead patterns. Try weaving the beads in a zigzag pattern, creating alternating rows of different colored beads, or even incorporating charms or small pendants into the design.

This image is property of images.unsplash.com.
Friendship Bracelet
Friendship bracelets are not only a fun and nostalgic design to make, but they also make great gifts for your loved ones. These bracelets are traditionally made using colorful embroidery floss, and they are known for their intricate knotting patterns.
To create your own friendship bracelet, you will need a few materials. First, gather embroidery floss in various colors. You can choose as many colors as you like, depending on the complexity of your design. You will also need a pair of scissors and a clipboard or tape to hold the bracelet in place while you work.
Before diving into the knotting techniques, let’s go over the basic knots used in friendship bracelet making. The most common knots are the forward knot (also known as the right knot) and the backward knot (also known as the left knot). The forward knot is created by taking the left string and crossing it over the middle strings, then taking the right string and crossing it over the left string and under the middle strings. The backward knot is the opposite, with the right string crossing over the middle strings and the left string crossing over the right string and under the middle strings.
Now that you have a grasp of the basic knots, you can start creating different patterns for your friendship bracelet. Experiment with different combinations of forward and backward knots to create stripes, chevron patterns, diamonds, or any other design you can imagine. You can also add beads or charms to your friendship bracelet to make it even more unique.
Once you’ve finished knotting your friendship bracelet, it’s time to add personalized touches. You can braid the excess floss at each end to create decorative tassels or tie additional knots. You can also attach small charms or pendants to the bracelet using jump rings or by tying them onto the threads. Let your creativity shine and make your friendship bracelet truly one-of-a-kind.
Charm Bracelet
Charm bracelets are a timeless accessory that allows you to showcase your personality and tell your story through various charms. Making your own charm bracelet is a fantastic way to express your creativity and curate a collection of charms that hold meaning to you.
To get started with your charm bracelet, gather the materials you’ll need. Begin by selecting a bracelet chain in a metal of your choice, such as silver, gold, or rose gold. You will also need an assortment of charms that resonate with you and reflect your interests, hobbies, or memories. Jump rings and jewelry pliers are essential for attaching the charms to the bracelet chain.
When choosing charms for your bracelet, consider what themes and styles you want to incorporate. You can opt for nature-themed charms, travel-themed charms, or even go with something more whimsical like animal or hobby-themed charms. The key is to select charms that hold personal significance or speak to your individuality.
Once you have your charms ready, it’s time to attach them to the bracelet chain. Use jump rings to connect each charm securely onto the chain. Open the jump ring with jewelry pliers, slide on the charm, and then close the jump ring tightly. Make sure the charms are evenly spaced and distributed along the length of the chain for a balanced and visually appealing design.
To create a theme for your charm bracelet, consider grouping similar charms together. For example, if you’re going for a beach-themed bracelet, you could cluster seashell, starfish, and palm tree charms. Experiment with different combinations and arrangements until you achieve a cohesive and visually appealing look.
Remember, charm bracelets are highly customizable, and you can always add or remove charms to reflect new experiences or milestones in your life. Don’t be afraid to let your creativity flow and make your charm bracelet an ever-evolving work of art.

This image is property of images.unsplash.com.
Wrap Bracelet
Wrap bracelets are versatile accessories that can add a touch of bohemian flair to any outfit. These bracelets are typically made using string, leather cord, or even beads and can be wrapped around the wrist multiple times to create a layered and textured look.
To get started with your wrap bracelet, you’ll need a few materials. First, select the right string or leather cord for your design. You can choose from a variety of options, such as waxed cotton cord, suede cord, or even elastic cord. You will also need a selection of beads, charms, or other embellishments to add texture and visual interest to your bracelet. Scissors, a closure like a button or a clasp, and jewelry glue (if needed) will also be handy.
When selecting the string or cord for your wrap bracelet, consider the desired thickness and flexibility. Thinner cords are ideal for delicate and intricate designs, while thicker cords add more substance and durability.
To create different wrap styles, you can experiment with various techniques. One common approach is to string beads onto the cord before wrapping it around your wrist. You can alternate between bead colors or types to create a pattern or mix and match different beads for an eclectic look. Alternatively, you can use multiple strands of string or cord, each with its own set of beads, and wrap them together for a layered effect.
Adding embellishments to your wrap bracelet can elevate its design. Consider attaching small charms, pendants, or even tassels to the ends of the cords for a bohemian touch. You can also use jewelry glue to secure some beads or charms directly onto the cord, creating an integrated and unique look.
Make sure to cut the cords to a length that allows for multiple wraps around your wrist, plus a little extra for securing the closure. Attach a button, clasp, or create a simple knot as a closure, depending on the type of cord you’re using. Test the fit before finalizing the closure to ensure a comfortable and secure fit.
Have fun exploring different wrap styles and mix and match various string types, beads, and charms to create beautiful and eye-catching wrap bracelets.
Leather Cord Bracelet
Leather cord bracelets offer a rustic and natural look that can be dressed up or down. They are relatively simple to make and allow for endless customization possibilities.
To create your own leather cord bracelet, gather the necessary materials. You will need leather cord, clasps or fasteners for closures, scissors, and any decorative elements you want to add, such as beads or charms.
First, measure and cut the leather cord to your desired bracelet length. It’s a good idea to leave a few extra inches on each end to accommodate the fasteners and allow for adjustability.
Next, attach the closure. There are various options for clasps or fasteners, such as lobster clasps, toggle clasps, or magnetic clasps. Choose the one that suits your style and preferences. You can also get creative and use decorative buttons or unique findings as closures.
To attach the closure, simply loop the ends of the leather cord through the clasp or fastener and secure them in place using glue or by tying knots. Make sure the closure is secure and won’t slip off your wrist.
Once you have the basic bracelet structure, it’s time to decide on decorations. You can enhance the bracelet with beads, charms, or other ornaments. Simply slide the chosen beads onto the leather cord before attaching the closure. You can create patterns or mix different bead types to add interest and personalize your bracelet further.
If you’re feeling adventurous, consider adding knots or small braids to your leather cord bracelet. These details can give your bracelet a unique texture and dimension. There are various knotting techniques you can explore, such as the square knot or the cobra knot.
Feel free to experiment with different leather colors, bead combinations, and knotting styles to create a bracelet that suits your individual style and preferences.
Rope Bracelet
Rope bracelets offer a rugged and nautical feel that can add a touch of adventure to your style. They are simple to make and can incorporate interesting details and designs.
To create a rope bracelet, start by gathering the necessary materials. Choose a rope that suits your desired style—cotton, nylon, or even paracord are popular options. You will also need a closure, such as a knot or a clasp, and any decorative elements you want to add, such as beads, nuts, or small pendants.
Begin by measuring and cutting the rope to your desired bracelet length. Keep in mind that the rope will have to wrap comfortably around your wrist, with an extra few inches for the closure.
Next, decide if you want to add a clasp or simply create a knot as a closure. If using a clasp, follow the manufacturer’s instructions to attach it securely to the ends of the rope. If using a knot, there are various options to choose from, such as a simple overhand knot or a more intricate decorative knot.
Once you have the basic structure of the bracelet, it’s time to get creative with decorating the rope. You can slide beads onto the rope and secure them in place with knots on either side. If you prefer a cleaner look, you can thread beads onto a separate piece of string or cord and attach them to the rope using jump rings or knots.
Interesting details can be added by incorporating knots or decorative elements directly into the rope itself. Feel free to experiment with different knotting techniques, such as the crown knot or the snake knot, to create unique textures and designs.
Rope bracelets lend themselves well to a layered look, so don’t be afraid to stack multiple bracelets together. Experiment with different rope colors and thicknesses to create striking combinations.
Tassel Bracelet
Tassel bracelets are a trendy and playful accessory that adds movement and color to your wrist. They are relatively simple to make and allow for myriad color combinations.
To make your own tassel bracelet, gather the necessary materials. You will need embroidery floss or thin string in various colors, scissors, a ruler or measuring tape, small jump rings or cord ends, and a closure, such as a clasp or a knot.
Begin by creating the tassels. Take your chosen colors of embroidery floss or string and cut a length of about 6-8 inches. Fold the floss or string in half and loop it around your fingers. Next, cut a separate piece of floss or string, about 8-10 inches long, and tie it securely around the folded floss, creating a loop at the top. Cut through the folded floss at the bottom to create the tassel ends. Repeat this process to create as many tassels as desired.
Once you have the tassels ready, it’s time to assemble the bracelet. Measure your wrist to determine the desired bracelet length, and cut a piece of embroidery floss or string to that size, adding a few extra inches for the closure.
Attach the closure by tying or securing one end of the floss or string to the closure piece, whether it’s a clasp or a knot. To attach the tassels, simply thread the looped top through the bracelet floss or string. Secure the looped end in place by tying a knot or using a jump ring or cord end.
Play around with different color combinations for your tassel bracelet. You can create a monochrome look with various shades of the same color or go for a vibrant and eclectic mix of colors. The choice is yours!
Embroidery Floss Bracelet
Embroidery floss bracelets are a classic and nostalgic accessory that never goes out of style. They are easy to make and offer endless possibilities for mixing colors and creating intricate patterns.
To create your own embroidery floss bracelet, gather the necessary materials. You will need several colors of embroidery floss, a clipboard or tape to hold the bracelet in place while you work, scissors, and any decorative elements you want to add, such as beads or charms.
Embroidery floss bracelets typically involve various knotting techniques, so it’s crucial to familiarize yourself with these techniques. Two common knots used in embroidery floss bracelet making are the forward knot (right knot) and the backward knot (left knot). The forward knot is created by taking the left string and crossing it over the middle strings, then taking the right string and crossing it over the left string and under the middle strings. The backward knot is the opposite, with the right string crossing over the middle strings and the left string crossing over the right string and under the middle strings.
To start making your bracelet, choose the colors of embroidery floss you want to use. Cut several strands of each color, making sure they are all roughly the same length. Gather the strands together and tie a secure knot at one end, leaving a short tail.
Next, secure the knotted end to a clipboard or tape to hold it in place while you work. Divide the strands into groups, alternating between colors. Start by knotting the first group of strands. Take the leftmost strand and create a forward knot onto the next strand in line. Repeat this process with the rest of the strands in the group, making sure to maintain the same color order.
Continue knotting each group of strands in the same manner, creating rows of knots until you reach your desired bracelet length. You can create various patterns and designs by experimenting with different color combinations and knotting techniques. Don’t be afraid to get creative and mix in beads or charms to add visual interest.
Once you’ve finished knotting, tie a secure knot at the end of the bracelet, leaving a short tail. You can then attach a clasp or create a loop closure using jump rings or additional knots.
Mix and match colors, patterns, and knotting techniques to create stunning embroidery floss bracelets that showcase your personal style.
Wire-Wrapped Bracelet
Wire-wrapped bracelets offer a unique and elegant look, incorporating intricate wire designs and lovely gemstone or bead accents. While creating a wire-wrapped bracelet requires a bit more skill and practice, the end result is definitely worth it.
To create your own wire-wrapped bracelet, gather the necessary materials. You will need jewelry wire in your preferred gauge (thickness), jewelry pliers, wire cutters, beads or gemstones, and a clasp or closure.
Start by selecting your wire. Choose a gauge that suits your design. Thicker wires offer sturdiness and structure, while thinner wires allow for more intricate wrapping.
To begin crafting the wire-wrapped bracelet, cut a length of wire to the desired bracelet size, including a few extra inches for wrapping and attaching the closure. Use the jewelry pliers to create a loop or bend at one end of the wire, forming the foundation for the bracelet.
Now, it’s time to get creative with wire wrapping. Experiment with different techniques and designs, such as weaving the wire around itself, creating coils or spirals, or incorporating gemstone or bead accents. You can twist and wrap the wire around the foundation loop, crisscrossing and intertwining the wire strands to achieve various effects.
If you’re adding beads or gemstones, thread them onto the wire before wrapping. Position them between the wire strands and secure them in place using wire coils or wraps. This will create lovely accents and focal points throughout the bracelet.
Throughout the wire-wrapping process, be sure to maintain consistent tension to create an even and visually appealing design. Use the jewelry pliers to tighten and adjust the wire as needed.
Once you’ve finished wire wrapping, create a loop or bend at the other end of the wire to match the initial loop or bend. Attach a clasp or closure to these loops using jump rings or by twisting the wire ends around the closure piece.
Wire-wrapped bracelets allow for endless design possibilities. Let your creativity flow by exploring different wire patterns, bead combinations, and gemstone choices. The intricate wrapping and attention to detail will result in a stunning and personalized bracelet.